



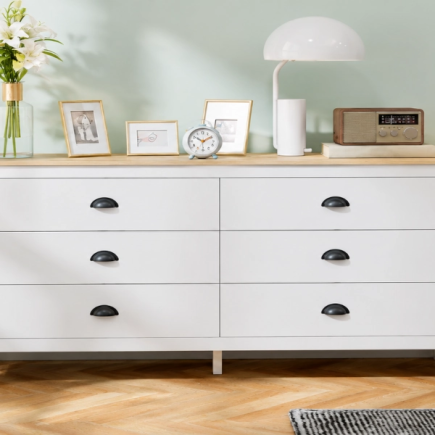

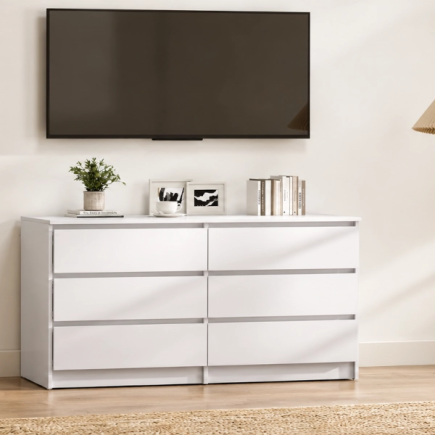



























A dresser’s top collects dust, perfume rings and fingerprints, while the drawers quietly gather lint, crumbs and musty smells. Left alone, grime builds up along the runners, drawers start to stick and the finish loses its shine. The good news is that cleaning one properly takes just a few basic supplies and about an hour of hands-on work, plus some drying time. Here’s how to do it, step by step.
What You’ll Need
Gather everything before you start so you’re not hunting for supplies with the drawers out.
| Item | What It’s For |
| Microfibre cloths | Dusting and drying without scratches |
| Vacuum with attachments | Corners, runners and drawer openings |
| Mild soapy water | Wiping with a barely damp cloth |
| Toothbrush and screwdriver | Cleaning grooves and removing handles |
| Suitable cleaner or polish | Protecting your dresser’s finish |
| Baking soda | Absorbing drawer odours |
| Bar of soap or candle stub | Helping sticky drawers slide |
| Drawer liners (optional) | Protecting drawer bottoms |
Step 1: Empty and Remove the Drawers
An empty dresser is much easier to clean, so start by clearing it out completely.
- Take everything out of the drawers and off the top, and place clothes on the bed or in a laundry hamper.
- Use this moment to declutter. Set aside anything you no longer wear and toss old receipts and broken items.
- Pull each drawer out completely and lay them on a towel or old sheet. Some drawers have a small catch on each runner that you press to release them.
- If a drawer won’t come out easily, don’t force it.
Step 2: Dust and Vacuum Everything
Removing loose dust first stops it from turning into muddy streaks once you start wiping.
- Work from top to bottom, dusting the top, sides and front with a dry microfibre cloth.
- Use the vacuum’s brush attachment inside the empty drawer openings, where dust and lint settle.
- Run the crevice tool along the runners and into the corners.
- If you can, lift the dresser away from the wall and vacuum the back panel and the floor behind it.
Step 3: Clean the Drawers Inside and Out
With the drawers out, you can reach every corner and give them a proper cleaning.
Wipe the Drawers Clean
- Wipe the bottom, sides and undersides of each drawer with the damp cloth, paying attention to the corners where crumbs collect.
- Rinse the cloth often so you don’t spread dirt from one drawer to the next.
2. Loosen Sticky Spots and Grime
- Rest the damp cloth on any sticky spot for a minute to soften it, then wipe again.
- Use the toothbrush to loosen dirt from joints and grooves.
3. Let Them Air Out
Leave the drawers out for at least an hour before refilling, so clothes don’t pick up a musty smell.
Step 4: Clean the Exterior Surfaces
The outside is what everyone sees, so take your time to get it streak-free.
1. Wipe With the Grain
- Wipe the top, sides, frame and drawer fronts with the damp cloth.
- On wood, follow the direction of the grain to lift dirt from the fine lines.
2. Deal With Stubborn Marks
- Rest the damp cloth on perfume or makeup marks for a minute to soften them, then rub gently in small circles.
- Never use a scouring pad or abrasive cleanser.
3. Rinse and Dry Right Away
- Follow with a second cloth dampened in clean water, as leftover soap leaves a dull film that attracts dust.
- Buff each section dry as you go, since standing water can leave white marks or make the finish peel.
Step 5: Clean the Handles and Knobs
Handles are touched every day, which makes them one of the dirtiest parts of the dresser.
- Wipe handles with the soapy cloth and use the toothbrush around the edges where they meet the drawer.
- If they’re very grimy, unscrew them and soak them in warm soapy water for 10 to 15 minutes, then scrub gently and rinse.
- Keep the screws in a small bowl so none go missing.
- Make sure metal handles are completely dry before putting them back on, as trapped moisture can cause rust or tarnish.
Step 6: Polish the Surface (Optional)
A light polish restores shine and adds a protective layer, but only when the finish needs it.
- Only apply polish once every surface is dry, as polishing over damp patches can leave cloudy marks.
- Apply a small amount to a clean cloth rather than directly onto the surface.
- On wood, buff in the direction of the grain.
Step 7: Freshen, Fix Sticky Runners and Reassemble
Before you refill the drawers, take a few minutes to make sure they smell fresh and run smoothly.
1. Freshen the Drawers
- Sprinkle a thin layer of baking soda across each drawer bottom, leave it for a few hours or overnight, then vacuum it out.
- Lay fresh liners in each drawer and add a small sachet of dried lavender to keep clothes smelling fresh.
2. Fix Sticky Drawers
- Rub a dry bar of soap or a candle stub along wooden runners so the drawers glide smoothly.
- For metal runners, check for trapped debris and wipe them clean.
3. Put Everything Back
- Slide the drawers in and check that each one opens and closes smoothly.
- Put your clothes back, folding them neatly as you go.
Cleaning Tips for Different Dresser Materials
The steps above work for most dressers, but each finish reacts differently to water and cleaners. Always test a new product on a hidden spot first, such as the back panel or inside a drawer.
- Solid wood: Use as little water as possible, as solid wood absorbs moisture and can warp. Avoid all-purpose sprays and anything containing ammonia or bleach, which can strip the finish.
- Painted: Wipe gently with a soft, lightly damp cloth, as scrubbing can lift the paint. Take extra care around chips and worn edges, where water can get under the paint.
- Laminate or MDF: Keep water away from edges and seams, where moisture can seep in and make the board swell. Wipe up spills right away, as swollen MDF usually can’t be repaired.
- High-gloss or lacquered: Use a slightly damp microfibre cloth and buff dry right away to avoid streaks. Skip polish and paper towels, which can leave smears or fine scratches.
How Often Should You Clean a Dresser?
A simple routine keeps dust under control, protects the finish and stops smells from building up in the drawers.
| Task | How often |
| Dust the top and front | Weekly |
| Wipe handles and surfaces with a damp cloth | Monthly |
| Full deep clean, drawers out | Every 3 to 6 months |
| Polish (wood dressers) | Every 3 to 6 months |
If your dresser is in a humid room or a damp basement, check inside the drawers more often for signs of moisture or mould.
A Fresh, Smooth-Running Dresser for Years to Come
With regular dusting and a deep clean every few months, your dresser will look its best for longer. But if the drawers still stick after cleaning, the panels have swelled or the finish is worn through, it may be time for an upgrade. A new dresser can give you more storage, smoother drawers and a fresh look for your room.
FAQs
It’s best avoided on wood. Vinegar is acidic and, if used often or undiluted, can dull or soften some varnishes and waxes. If you do try it, dilute it well with water, test a hidden spot first and dry the surface right away.
Fresh white rings are usually moisture trapped in the finish. Lay a thin cotton cloth over the mark and run a warm, dry iron (no steam) over it for a few seconds at a time, checking often. Stop if the finish starts to change.
They’re not ideal for regular use. Many contain alcohol or strong cleaning agents that can dull wood, paint and lacquer and leave a sticky residue. Mild soapy water is gentler and works just as well on everyday grime.
On sealed surfaces, rub a little olive or vegetable oil into the residue, leave it for a few minutes, then lift it gently with a plastic scraper or an old gift card. Wipe with mild soapy water afterwards and dry thoroughly.
Spray glass cleaner onto a microfibre cloth rather than the mirror, so liquid can’t drip into the frame or seep behind the glass and damage the silver backing. Wipe from top to bottom in an S-shaped pattern, then buff dry.