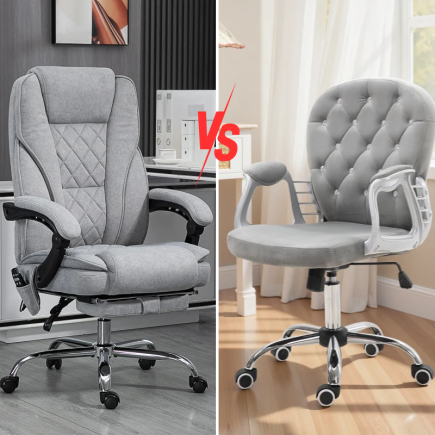
The Vinsetto Office Chair 6-Point Vibration Massage Chair blends ergonomic comfort with advanced relaxation features. Designed for long study or work sessions, it supports your back, lumbar, and thighs through six vibration points and an integrated heating function. Its breathable leather (polyester) finish combines the softness of leather with the durability and easy care of fabric.
Parts List

Safety Precautions
- Ensure all parts are complete and undamaged before beginning assembly.
- Assemble the product on a clean, flat, and stable surface to prevent scratches or instability.
- Do not use power tools unless specifically recommended, to avoid overtightening or damaging screw threads.
- Keep plastic bags, small parts, and hardware away from children to prevent suffocation or choking hazards.
- Check and tighten all bolts periodically to maintain stability and safety.
- Use the product only for its intended purpose. Do not stand, jump, or apply uneven weight on the chair.
- Avoid using the massage or heating function in damp or wet conditions.
- Unplug the adapter before cleaning or when not in use to prevent electrical hazards.
- Maximum load capacity: 264 lbs (120 kg) exceeding this may cause damage or injury.
Assembly Instructions
When you are going to assemble Your Vinsetto Office Chair 6-Point Vibration Massage Chair (SKU: 921-246V80BN) carefully follow these steps and go ahead!
Step 1: Attach the Casters to the Base

- Place Base (F) upside down on a flat surface.
- Insert each Caster (G) stem into the socket on every base leg.
- Press firmly until you hear a click, confirming it’s securely locked.
- Repeat for all five casters, ensuring they spin freely.
Step 2: Install the Gas Lift

- Take the Base (F) assembled in Step 1 and place it upright on a flat surface.
- Insert the Gas Lift (E) vertically into the center hole of the base.
- Slide the Plastic Cover (O) over the gas lift to conceal it and give a finished look.
- Press down gently to ensure the lift is seated securely and stable.
Step 3: Attach the Mounting Bracket to the Backrest

- Place the Backrest (A) face down on a soft surface to avoid scratches.
- Align the Mounting Bracket (P) with the pre-drilled holes on the lower rear side of the backrest.
- Secure using 4 × Bolts (H4: M6×25 mm) with the Allen Key (H4).
- Tighten each bolt approximately 70% to allow for later adjustment.
Step 4: Attach the Seat Mechanism to the Seat Cushion

- Place the Seat Cushion (B) upside down on a soft, flat surface.
- Position the Seat Mechanism (D) on the underside of the seat cushion, aligning holes as shown.
- Ensure the “Front” label on the mechanism faces the front edge of the seat.
- Secure using 4 × Bolts (H1: M6×20 mm) with the Allen Key (H4).
- Tighten all bolts evenly to secure the mechanism firmly in place.
Step 5: Attach the Backrest to the Seat Assembly

- Align the Backrest (A) with the mounting bracket on the Seat Cushion Assembly.
- Match the holes on both sides of the backrest with the seat mechanism’s brackets.
- Insert and secure using 2 × Bolts (H2: M8×20 mm) on each side.
- Tighten bolts firmly using the Allen Key (H4) until the backrest is stable.
- Check alignment before fully tightening to ensure smooth reclining function.
Step 6: Attach the Armrests

- Align the Armrests (C) with the pre-drilled holes on both sides of the Seat and Backrest Assembly.
- Position the Washers (J) and Spring Washers (K) on each Bolt (H3: M8×40 mm).
- Insert the bolts through the armrest holes and into the threaded holes on the chair frame.
- Tighten all 4 × Bolts (H3) evenly using the Allen Key (H4) to ensure firm attachment.
- Confirm both armrests are aligned and stable before proceeding to the next step.
Step 7: Attach the Seat Assembly to the Base

- Carefully lift the Seat and Backrest Assembly completed in Step 6.
- Align the Socket of the Seat Mechanism with the Gas Lift (E) installed in the base.
- Lower the seat assembly slowly onto the gas lift until it fits securely in place.
- Sit on the chair gently to ensure the gas lift locks properly into the mechanism.
- Test the chair’s height adjustment, swivel, and reclining functions to confirm smooth operation.
Step 8: Final Tightening and Inspection

- After confirming that all components are correctly aligned, tighten all bolts and screws to 100% using the Allen Key (H4).
- Double-check every connection point, including the armrests, backrest, and seat mechanism, to ensure they are securely fixed.
- Make sure the chair’s movement,swivel, recline, and height adjustment,works smoothly.
- Ensure the chair is stable and balanced before first use.
The assembly is now complete; connect massage and heating cables as instructed in the operating guide before use.
Operating Instructions

Massage Function
- Plug the power adapter (I) into the socket beneath the seat.
- Connect the adapter to a standard AC 100-240 V outlet.
- Use the wired remote (H) to activate the massage mode.
- Select target zones (back, lumbar, thigh) and preferred intensity or pattern.
- Choose a timer (15 / 30 / 60 minutes) for auto shut-off.
Operational Safety
- This product is not a medical device and should not be used as a substitute for medical treatment.
- If you experience discomfort, dizziness, or pain while using the massage or heating function, stop immediately and consult a physician.
- Not recommended for children, pregnant women, or individuals with pacemakers or circulation issues without medical advice.
- Do not use the chair while under the influence of alcohol or sedatives.
- Ensure the chair is switched off and unplugged before inserting or removing any connectors.
Heating Function
- Press the Heating (AQUECIMENTO) button on the remote to activate.
- The indicator light turns on when heating is active.
- Press again to deactivate the heater.
Maintenance & Care
- Clean with a soft, damp cloth only. Do not use abrasive cleaners.
- Check and retighten bolts periodically to maintain stability.
- Keep the chair away from direct sunlight or heaters to avoid fabric damage.
- Disconnect power before moving or cleaning the chair.
- Never disassemble or modify the massage or electrical system.
- Repairs should only be carried out by qualified technicians or authorized service providers.
- Use a soft, damp cloth for cleaning. Do not use solvents, bleach, or abrasive cleaners.
Troubleshooting
| Issue | Possible Cause | Solution |
| Massage does not start | Loose or disconnected cables | Check and reconnect all wires. |
| No power | Adapter unplugged | Reconnect adapter and verify outlet. |
| Heating not working | Function not activated | Press the Heating button to enable. |
| Chair tilts or wobbles | Uneven tightening | Loosen and retighten screws evenly. |
| Footrest sticks | Misaligned rails | Adjust rails and re-insert smoothly. |
Ready for Use
Congratulations! Your Vinsetto Office Chair 6-Point Vibration Massage Chair (SKU: 921-246V80BN) is now fully assembled and ready to enjoy. With proper care and regular maintenance, your Vinsetto chair will continue to provide relaxation, ergonomic support, and professional style for years to come.
You can also download the full Vinsetto Office Chair Assembly Manual (PDF) for future reference.
Still need help?
If you encounter any issues during assembly or operation, please reach out to Aosom Customer Support for friendly assistance and expert guidance.
FAQs
1. Why is my Vinsetto massage chair not turning on?
Check that the power adapter is fully inserted into both the chair socket and wall outlet. Confirm the outlet has power by testing another device.If still unresponsive, unplug for 5 minutes before reconnecting to reset the system.
2. The heating function isn’t working ,what should I do?
Ensure the chair is plugged in and press the “Heating” button until the indicator light turns on. If no response, verify that the massage mode isn’t active-only (some functions share circuits). Try a different outlet and avoid using power strips with surge protection that may block output.
3. My chair wobbles after assembly. How can I fix it?
Turn the chair upside down and inspect all bolts under the seat and at the armrests. Loosen slightly, realign parts, and then retighten evenly with the provided Allen key. Make sure the casters are fully clicked into place and the gas lift is seated correctly.
4. The massage feels weak or uneven ,how can I improve it?
Check that all vibration points are connected and the backrest cable isn’t pinched. Set a higher intensity level or switch zones using the remote. For better contact, sit upright and avoid thick cushions or blankets over the seat.
5. How should I clean and maintain my Vinsetto chair safely?
Unplug the chair before cleaning and let it cool down if recently heated. Use a soft, damp cloth ,never solvents, bleach, or sprays. Tighten screws monthly and store the chair away from direct sunlight or heaters.


