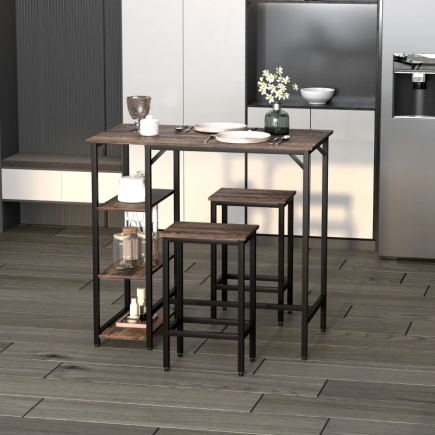
Building a console table yourself is not only cost-effective but also a great way to create a piece tailored to your home’s style and needs. This DIY design gives you a high-end, counter-height table with faux drawer detailing perfect for entryways, living rooms, or behind a sofa. It’s beginner-friendly and doesn’t require advanced woodworking equipment, though we’ll share pro-level tips you can choose to use.
Tools and Materials Checklist

Before you begin, gather all your tools and supplies for a smoother build:
Essential Materials
- 4 stair newel posts (to be used as legs)
- 1×6 pine boards (for apron and tabletop)
- Wood glue
- CA glue (for filling knots)
- Clamps
- Drawer pulls or knobs
Recommended Tools
- Pocket hole jig (optional)
- Router table with ½” chamfer bit (optional)
- Track saw or circular saw
- Straight edge or cutting guide
- Power drill with 3/16″ bit
- Sander (orbital or hand block)
Lumber Cut List
| Piece | Quantity | Dimensions | Purpose |
| Front/Back Apron | 2 | 1×6, 51″ long | Frame structure |
| Side Apron | 2 | 1×6, 12″ long | Frame structure |
| Tabletop Boards | 3 | 1×6, 60″ long | Glued top surface |
| Table Legs | 4 | Stair posts, 34″ | Table support |
| Cross Supports | 2 | 2×2, 12″ long (opt.) | Added base stability |
Step 1: Trim and Shape the Table Legs

Start by cutting your stair newel posts down to size. Standard console tables sit at around 30″, but for this build, we’re going with a counter-height version, about 34″ for better presence in larger or sunken rooms.
Optional Enhancements
- Use a ½” chamfer bit on the bottom edges to soften and style the squared post ends.
- Sand the legs thoroughly, especially if repurposing old stair posts.
Step 2: Cut Apron Boards to Size

With your frame measurements finalized, cut the side and front apron boards accordingly:
- Front/Back: 51″
- Sides: 12″
Make sure all edges are straight, especially if you’re using a circular saw—use a guide to avoid wavy lines.
Step 3: Join Frame Boards to Legs
You can choose between two joinery options:
Mortise and Tenon (For Strength)
- Cut two 4″ mortises into each leg using a plunge router or chisel.
- Cut matching tenons at the ends of each apron board.
Pocket Hole Joinery (Faster Option)
- Trim apron lengths by 2″ to make up for lost tenon space.
- Drill pocket holes and use screws and glue to attach aprons to legs.
Either method works well depending on your tools and timeline.
Step 4: Carve Faux Drawer Fronts
To create the illusion of three drawers:
- Use a track saw or circular saw with a depth stop.
- Make two vertical cuts ⅛” deep on the front apron.
- Space the cuts evenly to divide the panel visually into three sections.
This trick gives a custom cabinet feel without the extra labor of real drawers.
Step 5: Assemble the Table Frame
Apply wood glue to the joints and assemble the full frame. Clamp tightly, ensuring the structure is square.
Add Extra Stability
- Attach two 2×2 cross braces between the lower parts of the legs.
- Use Cyanoacrylate glue or screws depending on visibility and finish preference.
Step 6: Apply Finish to the Frame
Before adding the tabletop, paint or stain the frame:
Finishing Tips
- Apply primer if using paint (especially dark colors).
- Use a matte or satin topcoat for durability.
- Lightly sand between coats for a smooth finish.
Painting before attaching the top reduces the chance of drips and uneven edges.
Step 7: Build the Tabletop

Glue up three 1×6 boards edge to edge to form the tabletop.
Tabletop Assembly Tips
- Apply wood glue evenly along each edge.
- Use bar clamps or pipe clamps to ensure even pressure.
- Let dry for at least 4-6 hours.
Once dry, trim the ends using a straightedge and saw for even sides. Cut to a final length of around 55″.
Step 8: Detail and Smooth the Top
Use a router to add a decorative edge like a chamfer or round-over. This softens the appearance and makes the table more polished.
Other Surface Enhancements
- Lightly sand the entire surface with 120-grit, then finish with 220-grit for smoothness.
- Optional: Torch the top for a weathered finish or add epoxy to knots for a glossy effect.
Step 9: Fill Any Voids or Knots

If using knotty or reclaimed wood, fill gaps with CA glue and accelerator spray.
Benefits of CA Glue:
- Fills deep gaps quickly
- Hardens in seconds with accelerator
- Sands flush without shrinking
Step 10: Attach the Top to the Base & Hardware

Set the top onto the base with a ½” overhang on all sides, except the back, where you can allow extra overhang to sit flush with a wall.
How to Secure the Top
- Add wood glue to the top of the legs.
- Drill pocket holes on the inside of apron boards and screw upward into the tabletop.
- Clamp for a tight fit and let it cure fully.
Use a power drill and 3/16″ bit to install drawer pulls or knobs into the spaces between your vertical saw cuts.
Mounting Tip
- Drill before attaching the front apron for cleaner holes.
- Measure twice to keep everything symmetrical and centered.
Optional Upgrades to Consider
Add more character to your table by:
- Swapping pine for walnut or oak
- Using reclaimed wood for a rustic look
- Adding a lower shelf between the legs
- Installing actual drawers in the apron
DIY Console Table Key Specs
| Feature | Detail |
| Height | 34″ (counter height) |
| Width | 55″ tabletop |
| Depth | 12″ apron boards |
| Legs | Stair newel posts (trimmed) |
| Build Time | 3–5 hours |
| Skill Level | Beginner to Intermediate |
You now have a fully functional, one-of-a-kind Console Table and you built it from scratch. Whether styled with books, plants, lamps, or kept clean and minimal, it’s a conversation piece with your craftsmanship at the center.
FAQs
1. How Do I Cut Apron Boards Straight?
To ensure your apron boards are cut straight, use a track saw or a circular saw with a straight edge guide. A guide helps avoid wavy lines and ensures precise cuts. If needed, check your cuts with a square to verify they are straight.
2. How Do I Make Sure My Table Legs Are Even?
Use a level to check the legs after cutting them to size. If you notice any unevenness, sand down the longer legs until they match. Also, double-check the height with a tape measure for consistency.
3. Can I Skip the Faux Drawer Carving?
Yes, you can skip the faux drawer carving if you prefer a simpler design. However, carving them adds a custom, high-end look without the complexity of building real drawers. It’s a simple but impactful detail.


