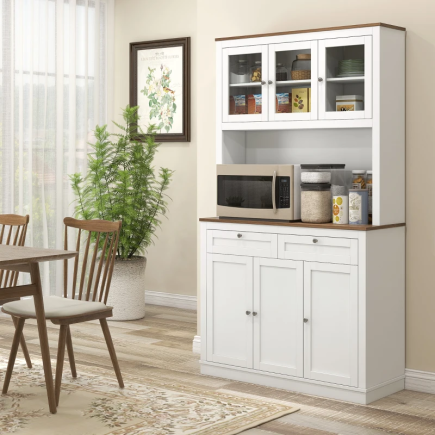
The HOMCOM 48″ Farmhouse Pantry Cabinet (838-213ND) blends rustic barn-door style with practical storage. With shelves, dividers, and a smooth sliding barn door, it’s perfect for organizing kitchen items, dishes, or pantry supplies while enhancing your home’s farmhouse look.
Estimated Assembly Time: 1–1.5 hours
Recommended Assembler(s): 2 adults
Warning and Safety Instructions
- Assemble on a flat, stable, dry surface to prevent panel damage.
- Do not confuse similar screws carefully before use.
- Do not fully tighten bolts until all parts are connected.
- Keep small parts and packaging away from children and pets.
- Do not exceed maximum shelf weight capacity.
- Keep away from direct sunlight, damp areas, or open flames.
- Always secure the cabinet to the wall with the included anti-tip belt.
- Avoid overtightening screws, which may damage wood panels.
Unboxing Your Pantry Cabinet: What’s Inside
Panels & Parts

Hardware Pack

How to Assemble Your Pantry Cabinet
When you are going to assemble your HOMCOM 48″ Farmhouse Pantry Cabinet (838-213ND follow these instructions step by step
Step 1: Insert Screws into Panels

- Take panels ②, ③, ④, and ⑤.
- Insert hardware A (x18) into the pre-drilled holes as shown.
- Make sure screws are straight and not overtightened.
Step 2: Prepare Panels and Brackets

- Panel ① (top panel):
- Insert hardware A (x4) into the pre-drilled holes.
- Attach bracket L (x1) using screw H (x1).
- Panel ⑦ (support bar):
- Attach part E (x1) using screws F (x2).
- Panel ⑪ (small bar):
- Insert hardware A (x2) into the pre-drilled holes.
- Panel ⑩ (base panel):
- Attach part ⑪ using dowels D (x2) and secure with cam locks B (x2).
Step 3: Attach Side Rails to Panels

- Panel ② and ④:
- Insert dowels D (x3) into the pre-drilled holes of panel ②.
- Position rail ④ onto panel ②, aligning the dowels.
- Secure with cam locks B (x4).
- Panel ③ and ⑤:
- Insert dowels D (x3) into the pre-drilled holes of panel ③.
- Position rail ⑤ onto panel ③, aligning the dowels.
- Secure with cam locks B (x4).
Step 4: Attach Vertical Panels and Top Panel

- Prepare Panel ② (Base):
- Insert dowels D (x6) into the pre-drilled holes along the top side of panel ②.
- Attach Vertical Panels (⑨ & ⑩):
- Place panel ⑨ and panel ⑩ upright on the dowels of panel ②.
- Secure both panels with cam locks B (x6) into the pre-installed cam bolts.
- Attach Support Panel (⑦):
- Insert dowel D (x1) into the pre-drilled hole on panel ②.
- Fix panel ⑦ upright into position.
- Install Panel ③ (Top Panel):
- Insert dowels D (x5) into the underside of panel ③.
- Align and lower panel ③ onto panels ⑦, ⑨, and ⑩, ensuring all dowels fit into place.
- Secure connections using cam locks B (x4).
Step 5: Attach Back Panel and Top Panel

- Take back panel ⑬ and slide it into the grooves of panel ②.
- Place top panel ① on top of the structure, aligning it with dowels (D x5).
- Secure the top panel using cam locks (B x4) and screws (C x2).
- Ensure the back panel is properly aligned before tightening everything.
Step 6: Secure Back Panel

- Position back panel ⑬ onto the cabinet frame.
- Attach brackets (J x10) using screws (F x10) evenly around the edges.
- Use screws (K x2) to secure the center of the panel for extra stability.
- Make sure the back panel is flush and square with the structure.
Step 7: Install Adjustable Shelves

- Insert shelf supports (N x8) into the desired holes inside the cabinet.
- Place shelves ⑧ onto the supports.
- Adjust the height by choosing one of the three optional buckle positions.
Step 8: Assemble and Attach the Door

- Attach hinges (M x3) onto panel ⑥ using screws (F x6).
- Fix the magnetic catch (Q x1) to the inside of the door frame with screw (G x1).
- Secure the strike plate (I x1) to the cabinet top rail with screw (F x1).
- Mount the door (⑥) onto the cabinet by fastening hinges with screws (R x6).
Step 9: Secure Cabinet to Wall

- Insert wall plug (O x1) into the drilled hole in the wall.
- Align the cabinet’s top bracket with the wall plug.
- Fasten securely using screw (P x1) to prevent tipping.
Final Touches & Care
- Ensure all screws, dowels, and cam locks are tightened.
- Adjust barn door rollers if sliding is uneven.
- Clean with a soft cloth; use mild damp cloth for spills.
- Avoid harsh cleaners, bleach, or abrasives.
- Re-tighten screws every few months for stability.
When to Call a Professional
- If major panels arrive cracked, warped, or don’t align.
- If the barn door rail cannot be installed securely.
- If the cabinet remains unstable after full tightening.
- If you’re unsure about drilling into your wall type.
Ready for Use
Your HOMCOM Farmhouse Kitchen Pantry Cabinet with Barn Door (SKU: 838-213ND) is now ready for use. With correct assembly, wall fixing, and regular care, it will bring rustic charm and reliable storage to your kitchen for years to come.
You can also Download HOMCOM 48″ Farmhouse Kitchen Pantry Storage Cabinet Manual (PDF) for your reference.
FAQs
1. What if the barn door doesn’t slide smoothly?
Check the track for debris or misalignment. Slightly loosen and re-adjust the roller screws, then retighten. Apply a small amount of furniture-safe lubricant if needed.
2. How do I fix shelves that wobble?
Ensure the shelf supports are fully inserted into the holes. Move supports to the same height on both sides for balance. Avoid overloading shelves beyond their weight limit.
3. What should I do if a cam lock won’t tighten?
Verify the dowel and cam bolt are fully inserted and aligned. Rotate the cam lock slowly until it clicks into place. If still loose, swap it with another lock from the hardware pack.
4. How can I make the cabinet more stable on uneven floors?
Adjust the cabinet position to the flattest area of your floor. Add small felt pads or shims under the base panels. Always secure the cabinet to the wall with the anti-tip belt.
5. What if screw holes don’t line up?
Double-check panel orientation against the manual before forcing parts. Loosen nearby screws to create slight flexibility for alignment. If misdrilled, use wood filler and re-drill carefully.


