


Building a fire pit yourself not only gives you full control over the design but also saves money compared to purchasing a pre-made model. With the right materials, a little effort, and some basic tools, you can create a custom fire pit that perfectly complements your yard. Plus, when you build it yourself, the possibilities are endless in terms of style and functionality.

In this guide, we’ll walk you through the entire process, from understanding legal requirements to selecting materials and finally constructing your fire pit. Whether you’re an experienced DIYer or a first-timer, this article will equip you with the knowledge you need to create a safe, stunning, and functional fire pit for your backyard.
Complying with Local Bylaws
In addition to fire codes, many cities in Canada have by-laws that govern the operation of fire pits. These rules might include things like:
- Burning hours
Some municipalities limit the hours during which fire pits can be used, typically from dusk until 11 pm, to avoid disturbing neighbors.
- Fire bans
During dry spells or certain weather conditions, many regions will impose fire bans, meaning you cannot use your fire pit until the ban is lifted.
By following these guidelines, you’ll ensure that your fire pit is not only safe to use but also compliant with local laws.
How to Ensure Your Fire Pit is Safely Located
Once you’ve confirmed that your fire pit will be built safely within legal guidelines, the next step is choosing the ideal location in your backyard. Here are some essential tips for selecting the perfect spot for your fire pit:
1. The Importance of a Flat Area
A flat area is essential for creating a stable fire pit. A level foundation ensures that your fire pit is evenly distributed, reducing the risk of tipping over. Ideally, pick a location on your lawn or gravel patio that is already even.
2. Avoiding Hazards
As mentioned earlier, avoid placing your fire pit near trees, buildings, or any flammable material. Additionally, consider how smoke and embers will behave when the wind blows. Make sure that the wind doesn’t carry smoke towards your outdoor seating area or neighboring homes.
3. Drainage
It’s important to build your fire pit in a location with good drainage. Avoid areas where water collects after rainfall, as standing water can weaken the structure of your fire pit and create unpleasant conditions for burning. Consider creating a small gravel base to allow water to flow through the pit easily.
Selecting the Best Materials for Your Fire Pit
The materials you choose for your fire pit will significantly impact both its safety and aesthetic appeal. Here’s a breakdown of the best materials to use, and which ones to avoid.
1. Fire-Resistant Materials
When building a fire pit, you must choose materials that can withstand high temperatures without cracking or releasing toxic fumes. The best materials for fire pits include:
- Concrete blocks: Concrete is a popular choice for fire pits because it is durable, heat-resistant, and relatively affordable. You can use concrete blocks, pavers, or even precast stone.
- Fire bricks: Fire bricks are specially designed to withstand high temperatures. They are often used for the interior lining of the fire pit to prevent heat damage to the surrounding materials.
- Steel fire rings: A steel fire ring helps contain the fire while protecting the stone or concrete from heat damage. It also adds a sleek, modern look to your fire pit.
2. Materials to Avoid
Some materials are not suitable for fire pits because they can pose a safety hazard. Avoid using:
- Pea gravel and river rocks: These stones can retain moisture and cause explosions when exposed to high heat. Always choose dry, heat-resistant materials like fire bricks for the interior.
- Wood or flammable materials: While wood is a natural choice for firewood, it should never be used as the structural material for your fire pit.
Step-by-Step Fire Pit Construction Guide
Now that you’ve selected your materials and site, it’s time to get building! Follow this step-by-step guide to create a beautiful and functional DIY fire pit.
Step 1: Marking and Measuring the Site
To start, use a stake and string to mark the location and size of your fire pit. Here’s how to do it:
- Drive a stake into the center of your chosen location.
- Tie a piece of string to the stake and extend it out to the desired radius of your fire pit.
- Walk around the stake, marking the perimeter with spray paint or a shovel. This will give you a clear outline of where to dig.
Step 2: Digging the Ground
Once your site is marked, dig the ground to prepare the foundation for your fire pit. You’ll need to:
- Dig a trench about 12 inches deep around the perimeter.
- Excavate the interior of the circle to a depth of about 6 inches. This will create a solid base for your fire pit.
Step 3: Laying the First Course of Blocks
Start laying the first course of blocks, ensuring they are level as you go. Here’s what to do:
- Place the first block at one point of the circle, checking for level both side to side and front to back.
- Continue adding blocks around the circle, using a rubber mallet to tap them into place.
- Use a level to check that each block is positioned evenly, making adjustments as necessary.
Step 4: Building Up the Walls
Once the first course is in place, continue adding additional layers of blocks. Be sure to:
- Stagger the joints between blocks for added strength.
- Apply masonry adhesive between each layer of blocks to hold them securely in place.
- Continue until you’ve built up the walls to your desired height.
Step 5: Installing the Steel Fire Ring
Once the walls are built, install the steel fire ring inside the pit to protect the blocks from heat damage. Here’s how to:
- Place the fire ring inside the pit and adjust it to sit level with the top of the block walls.
- Fill any gaps between the fire ring and the blocks with gravel for additional stability.
Step 6: Finishing with Capstones
To give your fire pit a polished look, finish the top layer with capstones. Here’s how:
- Arrange the capstones around the top of the fire pit.
- Apply masonry adhesive to the top of the walls before placing each capstone.
- Check that each capstone is level and has a slight overhang for a neat appearance.
Designing Your Fire Pit: Customizing to Your Space
Your fire pit should reflect your personal style and complement your outdoor space. Here are some tips for customizing your fire pit design:
1. Choosing Shapes
Most fire pits are round, but you can opt for a square, rectangular, or even asymmetrical design. Choose a shape that fits with the overall aesthetic of your backyard and surrounding features.
2. Integrating into Existing Landscaping
Consider the layout of your yard when placing your fire pit. A central location may be ideal if you’re creating a focal point, or you can place it off to one side if you want to retain more open space. Incorporating the fire pit into an existing patio or garden layout can help tie the space together.
3. Adding Seating
To make your fire pit even more inviting, add seating around it. Options include built-in benches, Adirondack chairs, or even movable chairs that allow you to reconfigure the space as needed.
Budget-Friendly Fire Pit Ideas for Canadian Homeowners
Building a fire pit doesn’t have to break the bank. In fact, you can create a stunning fire pit for under $100 by using affordable materials. Here’s how to keep your costs low:
- Use concrete blocks: These are cheap, durable, and easy to work with.
- Repurpose materials: You can find free or low-cost materials like salvaged bricks, large stones, or metal rings.
- Buy in bulk: Purchasing gravel and sand in larger quantities can save you money.
Functionality Enhancements: Making Your Fire Pit More Versatile
Once your fire pit is built, you can enhance its functionality to suit your needs.
1. Adding Cooking Capabilities
Consider adding a grill grate to your fire pit to create a dual-purpose feature. This allows you to cook over the flames while enjoying the warmth of the fire.
2. Smokeless Fire Pits
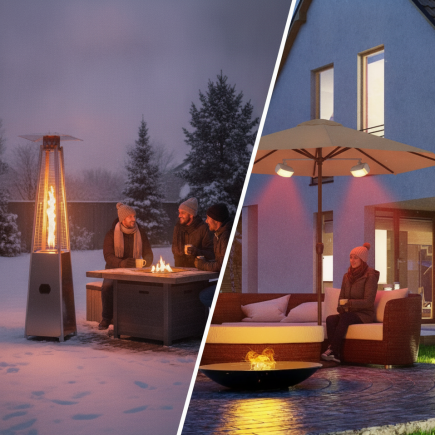
If you want a cleaner burn and less smoke, consider investing in a Smokeless Fire Pit. These fire pits are designed to minimize smoke by promoting better airflow.
Final Touches for a Complete Outdoor Fire Pit
Now that your fire pit is built, it’s time to add the finishing touches:
1. Decorative Landscaping
Consider adding landscaping stones, gravel, or a paver border around the base of your fire pit. This adds texture and visual appeal to your outdoor space.
2. Lighting
To create an inviting atmosphere, install outdoor lighting around the fire pit. Solar-powered lights or string lights can add ambiance while also improving safety at night.
Enjoying Your Fire Pit Safely and Comfortably
Building your own DIY fire pit is a rewarding project that adds both function and personality to your outdoor space. It allows you to customize the design, choose high-quality materials, and ensure everything meets local safety codes.
But we get it, not everyone has the time, tools, or desire for a full weekend build. If you’re looking for a simpler, faster option, a portable fire pit can be the perfect solution. Models like the Outsunny Wood-Burning Fire Pit offer convenience without compromising on style or safety. They’re easy to set up, move, and store, great for renters, small patios, or anyone who wants warmth without the wait.
FAQs
1. What do you put in the bottom of a fire pit?
Gravel or sand is best for the bottom of a fire pit as it provides good drainage, resists heat, and prevents water accumulation. It’s also inexpensive, easy to replace, and helps simplify ash removal during cleanup.
2. Can you just dig a hole for a fire pit?
Yes, you can dig a simple hole for a fire pit, but it’s best to line it with brick or stone. Most importantly, keep it a safe distance from your home, structures, decking, and neighbors due to the risk of traveling embers.
3. Can I put my fire pit on grass?
It’s not recommended to place a portable fire pit directly on grass, as flying embers pose a fire risk. Instead, set it on a fire-resistant surface like a brick patio or stone pavers to ensure safety.
4. Does a fire pit need drainage?
Yes, proper drainage is essential for an in-ground fire pit. Without it, water can collect at the bottom, leading to mosquito breeding, mold growth, and other issues that affect both hygiene and usability.