The HOMCOM Reclining Chair Bed with Footrest and USB Charging (83B-402V80GY) is designed to be stylish, versatile, and practical. With its space-saving pull-out design, customizable recline, and built-in charging ports, this chair adapts to your lifestyle while offering comfort and durability.
To get the most from your chair, follow all safety instructions, assemble carefully, and maintain it regularly. These instructions explain everything from safe setup and wiring to using features, cleaning, and troubleshooting..
Warning And Safety Instructions
- Indoor, domestic use only not for outdoor or commercial spaces.
- Place the chair on a flat, stable, dry floor.
- Keep away from flames or heat sources.
- Do not exceed a maximum load of 331 lbs (150 kg).
- Confirm no parts are missing or damaged before assembly.
- Prepare a clean, dry assembly area.
- Watch for pinch points during assembly : wear gloves if needed.
- Assemble with at least 2 people.
- Do not disassemble or modify. If motorized or electrical parts fail, only qualified personnel may repair.
- The manufacturer is not responsible for damage caused by incorrect installation.
Unboxing Your Chair: What’s Included

When unboxing, confirm that all items are present. Place all parts on a smooth, clean surface to prevent scratches.
Packing Details
- TOTAL: 1 Box
- Box 1/1 : All chair panels, hardware, and accessories.
Explosion Figure

(See included diagram with parts A-R, A-L, B, C, D-R, D-L, etc.)
Hardware List

- M8 × 50 mm bolts
- M6 × 20 mm screws
- M6 × 35 mm screws
- M4 × 20 mm screws
- Connectors, dowels, caps
- Hex key (spanner)
- Footrest hardware set
- Instruction manual
⚠ Screwdriver not provided.
⚠ Adapter not included : use certified 5V/2A adapter.
How to Assemble Your Chair Step-by-Step
Now it’s time to assemble your HOMCOM Reclining Chair Bed with Footrest & USB Ports (83B-402V80GY) which just need your little effort and time to make it happen.
Step 1: Prepare Your Assembly Area

- Insert wooden dowels (3) and washers (12) into the bottom holes of the armrests.
- Fit connector blocks (2) into the slots.
- Secure with M6 × 35 mm screws (6).
- Tighten lightly using the hex key (16).
Step 2: Connect Base and Seat

- Position the base panel (B) with the bottom side facing up.
- Attach the right armrest (A-R) and left armrest (A-L) to the base.
- Use M8 × 50 mm bolts (5) together with washers (10) and lock washers (11).
- Insert 10 sets total (5 on each side).
- Tighten lightly using the hex key (15), but do not fully tighten until all bolts are in place.
Step 3: Attach Backrest

- Position the backrest support brackets (D-R and D-L) along with the crossbars (E and F).
- Fix them in place using the corner brackets (4).
- Each bracket is secured with M6 × 20 mm screws (7) — 16 screws in total.
- Tighten with the hex key (16).
Step 4: Attach Armrests

Position the footrest frame (C) at the bottom side of the seat.
Secure the hinges using:
- M6 × 20 mm screws (7) ×4 (tighten with the hex key (16))
- M4 × 20 mm screws (8) ×4 (tighten with a screwdriver : not provided)
Fasten both sides (2 sets) to ensure the frame is stable.
Step 5: Attach Your Casters (Wheels) to the Footrest Frame C

- Turn the footrest frame (C) bottom side up.
- Insert the casters (1) into the corner holes.
- Secure each caster with a nut (9).
- Use the provided wrench (14) to tighten the nuts firmly.
- Repeat for all 4 wheels.
Step 6: Secure Your Seat Cushion (G) to the Frame C

- Position the seat cushion (G) above the assembled frame (C).
- Align the holes in the cushion with the holes on the frame.
- Insert M6 × 35 mm screws (6) ×3 through the frame into the cushion base.
- Tighten firmly using the hex key (16).
Step 7: Electrical Connection

- Locate the power socket (13) on the backside of your chair.
- Connect the USB power cable (13) securely to the socket.
- Use a certified 5V/2A power adapter.
- Plug the adapter into a standard wall outlet.
Step 8: Test Functionality

- Test recline, pull-out bed, footrest, and USB ports.
How to Use Your Chair’s Features

- Recline : Adjust to 7 positions for reading, lounging, or napping.
- Bed Conversion : Pull out the frame smoothly for a single bed.
- Footrest : Extend and lock for comfort.
- USB Charging : Use USB-A or USB-C to charge devices.
- Side Pockets : Store remotes, books, or devices.
Regular Maintenance and Cleaning
- Always disconnect power before cleaning.
- Wipe with a soft, dry cloth.
- Spot clean with damp cloth if needed.
- Do not use chemicals, abrasives, or excess moisture.
- Inspect screws and fittings regularly.
- Store in a clean, dry environment to avoid mold.
Troubleshooting Your Chair
| Problem | Possible Cause | Solution |
| Chair unstable | Loose screws | Re-tighten connections |
| Recline/footrest stuck | Misalignment | Re-adjust and tighten bolts |
| USB ports not working | Wrong/missing adapter | Use 5V/2A adapter |
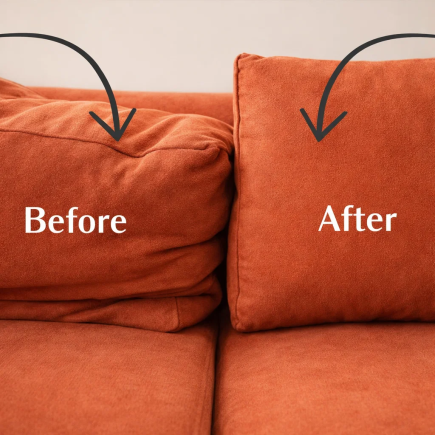
| Fabric sagging | Normal wear | Smooth fabric, avoid sharp objects |
When to Call a Pro
- If USB wiring fails or adapter connection sparks.
- If the chair is unstable after tightening.
- If parts are missing or damaged.
- If electrical parts need repair : only qualified personnel should attempt this.
Safety Reminders
- Indoor use only.
- Do not overload beyond 331 lbs (150 kg).
- Keep away from fire or heat.
- Only trained professionals should repair electrical parts.
It’s Ready to Use!
When properly assembled and maintained, your HOMCOM Reclining Chair Bed with Footrest & USB Ports provides comfort, versatility, and modern convenience. Follow the instructions for safe use and care, and enjoy years of reliable service.
Download the User Guide
You can also download the HOMCOM Reclining Chair Bed User Manual (PDF) to keep it for reference.
FAQs
1. What should I do if the chair is unstable after assembly?
If the chair is unstable, check for loose screws or bolts. Tighten all screws and connections securely. Regularly inspect and tighten fittings to maintain stability over time.
2. Why are the USB ports not working?
The USB ports may not work if the adapter is missing or incorrect. Make sure you are using a certified 5V/2A adapter to power the chair. Double-check the connection to ensure it’s secure.
3. How do I clean and maintain my HOMCOM Reclining Chair?
Always disconnect the power before cleaning. Wipe the chair with a soft, dry cloth, and use a damp cloth for spot cleaning. Avoid using chemicals or abrasives to maintain the fabric and chair structure.
4. When should I call a professional for repairs?
If there are issues with the USB wiring or if the adapter connection sparks, contact a professional. Additionally, if the chair remains unstable after tightening, or if electrical components need repair, consult a trained technician.


