Transforming a desk into a makeup vanity doesn’t require a large budget or a lot of time. Whether you’re working with a small apartment or want to create a dedicated beauty space, this step-by-step guide will show you how to turn your regular desk into a functional and stylish vanity.
Step 1: Choose the Right Desk

The desk you choose will serve as the foundation of your vanity. It’s important to pick one that meets your space requirements and offers the right functionality. Let’s break down the key aspects of selecting the perfect desk.
Surface Area
A disk’s surface space is crucial for spreading out makeup products and tools. You’ll need room to place your mirror, makeup containers, brushes, and other beauty essentials.
- Ideal Size: Aim for a desk that is at least 48 inches wide and 24 inches deep. This provides enough space to organize your makeup products and tools without overcrowding.
- Flat and Stable Surface: Ensure the desk has a flat, stable surface that can easily hold heavier items like a large mirror or makeup organizers.
Step 2: Find the Best Location for Your Desk

The right location for your desk will make the transformation process easier and help you enjoy your new vanity. The location should promote ease of access and lighting conditions that enhance your makeup routine.
Natural Light
Positioning your desk near a window is the best way to take advantage of natural light, which is ideal for makeup application.
- Benefits of Natural Light: Natural light ensures that your makeup will look good in various lighting situations, making it the most accurate for application.
- Window Placement: If possible, place your desk near a window, ensuring that the light doesn’t create harsh shadows while applying makeup.
Step 3: Install a Vanity Mirror with Built-In Lighting

A vanity mirror is essential for a makeup station, but one with built-in lighting will take your setup to the next level. It’s vital to choose the right mirror with lighting that enhances your makeup application.
Mirror Size and Shape
The mirror should be large enough to provide a clear reflection of your face while you apply makeup.
- Full View: Choose a mirror that provides a complete view of your face. A round, oval, or rectangular mirror works best for most spaces.
- Positioning: Ensure the mirror is positioned at eye level when seated, so you can easily see your face from all angles.
LED Lighting
Mirrors with built-in LED lights are a fantastic option. These lights provide even and consistent illumination, mimicking daylight to give you the most accurate reflection.
- Adjustable Brightness: Opt for a mirror with adjustable lighting to suit different times of day and makeup needs.
- Brightness Control: You can adjust the brightness to your preference, ensuring that you have ample light for detailed makeup applications like eyeliner or eyebrow shaping.
Step 4: Organize Your Makeup and Beauty Tools

An organized vanity helps streamline your beauty routine and keeps everything within arm’s reach. Let’s look at the best ways to store and organize your makeup products and tools efficiently.
Drawer Organizers and Dividers
If your desk has drawers, drawer organizers are a must. These dividers help separate products by category and keep everything neatly arranged.
- Foundation, Blush, Lipsticks: Store similar products together for quick access.
- Tools and Brushes: Allocate specific compartments for brushes, sponges, and makeup tools so that they remain clean and easy to grab.
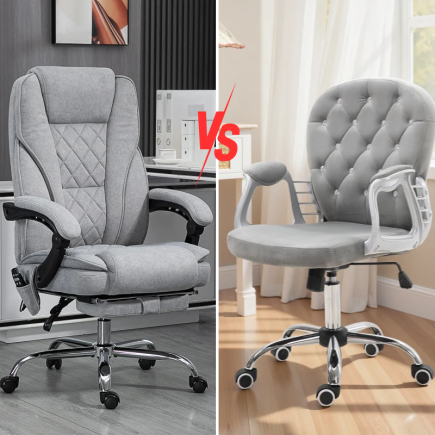
Step 5: Select the Right Chair

A comfortable chair ensures that your vanity setup is both functional and enjoyable to use. When creating a makeup vanity, comfort is essential for prolonged makeup sessions.
Adjustable Height
Look for a height-adjustable chair to ensure you’re seated comfortably at the right height for your desk and mirror. This will allow you to adjust the chair to suit your desk height, ensuring optimal comfort during your routine.
Cushioning for Comfort
Choose a cushioned chair, especially if you’ll be sitting for long periods while doing your makeup. A chair with good cushioning helps you stay comfortable during longer beauty sessions.
Step 6: Personalize Your Makeup Vanity

Once your vanity is functional, it’s time to make it your own. Personal touches will make the space inviting and reflect your personal style.
Decorative Touches
Decorate your vanity with elements that make the space feel cozy and chic. Consider adding candles, small plants, or framed photos to enhance the ambiance.
Add a Mirror Tray: Use a vanity tray to organize your everyday makeup products. This not only keeps them tidy but adds an elegant touch to your vanity setup.
Display Beauty Tools
Show off your favorite beauty products or high-end tools by placing them in stylish containers or on decorative trays. Displaying your products adds character and makes your vanity feel more personalized.
Step 7: Keep Everything Organized and Tidy
A clean and organized space helps make your beauty routine smoother and more enjoyable. Let’s look at how to keep your vanity tidy and functional.
Limit Surface Clutter
To maintain a clean workspace, keep only the essentials on the desk. Store anything you don’t use regularly in the drawers or on shelves.
- Daily Makeup: Keep only your most-used products on the desk to avoid clutter.
- Put Everything Back: After using a product, return it to its designated spot to keep your desk organized.
Final Thoughts
Turning your desk into a Makeup Vanity Table is an affordable and practical way to enhance your beauty routine while adding style to your space. With a few simple changes, like choosing the right desk, adding lighting, organizing your products, and personalizing your space, you can create a functional and chic vanity that makes applying makeup a joy. Whether you have limited space or a larger area to work with, these steps will help you design a vanity that’s tailored to your needs.
FAQs
1. How Can I Make My Vanity Look More Luxurious?
Add high-quality accessories like a gold-framed mirror or decorative trays. Incorporate elegant details, such as scented candles or a plush chair. Mixing metallic accents with soft textures can instantly elevate the space.
2. Can I Personalize My Makeup Vanity?
Yes, add personal touches such as candles, small plants, or framed photos to make your vanity space inviting. A decorative vanity tray is perfect for organizing daily makeup products while adding elegance. Display your favorite beauty tools for a chic look.
3. Can I Use My Vanity Desk for Other Purposes?
Yes, your vanity can double as a small workspace or a craft station. Keep makeup tools in organized storage and clear the surface when using it for other tasks. A desk with versatile storage will make this transition easier.
4. How Do I Set Up Proper Lighting for My Vanity?
Install a vanity mirror with adjustable LED lighting to mimic natural daylight. Brightness control helps you customize the light for different makeup needs. Make sure your lighting is even to avoid shadows while applying makeup.
5. What Should I Look for in Vanity Desk Storage?
Ensure your desk has sufficient storage to keep your vanity tidy. Look for desks with drawers or shelves that can hold makeup tools, brushes, and other accessories. Consider using small containers or trays to organize your beauty essentials.


