


Metal roofing is a popular choice for sheds because of its durability and long lifespan. Not only does it keep your shed dry and safe, but it also looks pretty darn cool! If you’re thinking about installing one yourself (because who doesn’t love a DIY challenge?).

This step-by-step guide will walk you through everything you need to know, from picking the right materials to finishing touches. Let’s get started!
Choosing the Right Metal Roofing for Your Shed
Before you even think about getting that ladder out, let’s chat about your roofing options. There are a few types of metal roofing, but you need to choose one that suits your shed, weather conditions, and budget. Spoiler alert: There’s no “one-size-fits-all” solution here!
What Types of Metal Roofing Materials Are Best for Sheds?
Here’s the breakdown of the top three metal roofing materials for sheds:
- Corrugated Steel Roofing: The rockstar of shed roofs. It’s cost-effective, durable, and super easy to install. It’s like the Swiss army knife of roofing materials. It can handle most weather conditions, making it the most popular option for your average shed.
- Aluminum Roofing: A little pricier but lightweight and rust-resistant. If you’re near the beach and salty air is your thing, aluminum might be your best bet.
- Standing Seam Roofing: For the high-end shed enthusiast! It’s the most durable and looks modern, but it comes with a premium price tag. Great if your shed is facing extreme weather or you just want to show off.
Material Breakdown: A Quick Comparison
| Material | Cost per Square Foot | Pros | Cons |
| Corrugated Steel | $1.50 – $2.50 | Affordable, durable | Can be noisy in rain |
| Aluminum | $2.00 – $4.00 | Lightweight, rust-resistant | More expensive |
| Standing Seam | $4.00 – $6.00 | Sleek, durable, minimal seams | High cost |
Pro Tip: If you want the best bang for your buck, go for corrugated steel. It’s affordable, durable, and gets the job done without breaking the bank.
Tools and Equipment You’ll Need for Metal Roofing Installation
Ready to jump in? Not so fast. You’ll need to gather a few tools and equipment before you get to work. Trust me, you don’t want to be halfway through the job and realize you don’t have a ladder. That’s a rookie move.
Essential Tools for Metal Roof Installation
- Screwdriver or Power Drill: To secure those panels like a pro.
- Measuring Tape: We don’t want any crooked panels, do we?
- Metal Snips: For cutting those panels to size (and maybe a few extra cuts for good measure).
- Ladder: The higher, the better, as long as it’s safe!
- Self-Tapping Screws: Make sure they’re rust-resistant. You don’t want your roof falling apart after a year.
- Safety Gear: Gloves, a harness, and sturdy boots. Protect those hands and feet; we don’t need any accidents!
Safety First!
- Always wear a harness when working at height. It might not be the most stylish look, but hey, safety is sexy.
- Gloves are a must, those panels are sharp enough to cut a pizza, let alone your hands.
Check the weather, don’t start roofing in the rain unless you want a slip ‘n slide situation.
Preparing the Shed for Metal Roofing Installation
Before you start slapping panels onto your shed, make sure it’s ready for the upgrade. Trust me, a solid foundation will save you from headaches later.
Measuring Your Shed’s Roof: It’s Easier Than You Think
- Step 1: Measure the length and width of the roof. Grab a measuring tape and go to town. No, really, don’t guess. Precision is your friend here.
- Step 2: Multiply the length and width to calculate the roof’s total area.
- Check the Roof Pitch: Make sure the pitch (that’s the angle of your roof) is at least 3:12 for proper water runoff. If your roof is flatter than a pancake, consider adding a slight slope.
Inspecting the Shed’s Frame
- Check Stability: Make sure your shed’s frame can support the roof. You wouldn’t want it collapsing on you after all your hard work!
- Clean the Roof: Sweep away old materials and debris. It’s like spring cleaning for your shed roof.
Installing Metal Roofing on Your Shed
Time to get that roof in place! Let’s take it step by step and make sure things are secure.
Step 1: Installing Underlayment
Underlayment is like the mattress pad to your bed, extra comfort (and protection). It helps keep moisture at bay, ensuring a longer-lasting roof.
- Roll out the underlayment starting at the eaves (that’s the bottom edge of the roof).
- Overlap the seams by 4-6 inches and secure it with roofing nails. Keep it tight and neat.
Step 2: Securing the Metal Panels
- Start from one end: Align your first panel with the roof’s edge. Don’t go off-center!
- Screw it down: Use self-tapping screws every 12-18 inches along the ribs (the raised parts of the panel). Don’t skip this step! A loose screw is a sad screw.
- Overlap the panels: Each panel should overlap at least one rib to prevent leaks. Think of it like making sure the roof is wearing a raincoat.
- Use a Chalk Line: This helps you keep everything aligned. It’s like using a ruler for your roof (very satisfying).
Step 3: Flashing and Ridge Caps Installation
Flashing is your roof’s secret weapon against water infiltration. Think of it as the unsung hero of roofing.
- Install flashing around the edges, valleys, or any other place where water might sneak in.
- Finish off with ridge caps at the roof peak to seal everything tight.
Common Mistakes to Avoid During Metal Roofing
1. Over-tightening Screws
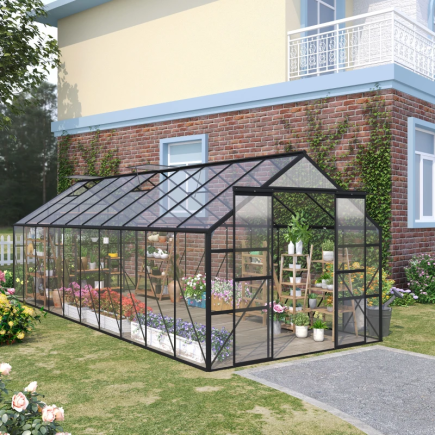
Don’t let these rookie mistakes ruin your hard work, especially when assembling structures like a Metal Garden Shed. Whether it’s roofing or setting up your new shed, precision matters.
2. Incorrect Panel Alignment
Take your time and align those panels. An uneven roof will haunt you forever. Seriously.
3. Skipping Flashing
Flashing is your roof’s raincoat. Without it, water will get in, and that’s just asking for trouble.
DIY vs. Professional Installation Costs
| Option | Cost Range | Pros | Cons |
| DIY Installation | $500 – $1,500 | Lower cost, sense of pride | Time-consuming, tricky |
| Professional | $1,500 – $4,000+ | Quick, expert work | Expensive |
How to Calculate Material Requirements
Multiply the length x width of your roof to get the area. Add an extra 10% for waste. Easy math!
Metal Roofing Weather Resistance and Longevity
Why is metal roofing a great choice? It laughs in the face of extreme weather!
How Metal Roofing Handles Extreme Weather
- Wind: It won’t blow away during a storm, metal roofs can handle gusts up to 140 mph!
- Rain and Snow: It sheds water quickly and resists rust.
- UV Rays: Reflects the sun, which means your shed stays cooler and the roof lasts longer.
Troubleshooting Tips After Installation
Even after installation, things can go wrong. Here’s how to fix common problems:
- Leaks: Check panel overlaps and screws. Tighten them if needed.
- Condensation: Install ridge or gable vents to improve airflow.
- Rattling Panels: Add more screws or tighten the existing ones.
Enjoy Your New Metal Roof
Congratulations! You’ve just installed a metal roof on your Sheds. Now you can relax and enjoy the view (preferably with a cold drink in hand). With a bit of elbow grease and the right materials, your shed is now safer, more durable, and ready to handle whatever weather comes its way.
FAQs
1. Do I need to worry about metal roofing rust?
Not really! As long as you inspect your roof regularly and treat any rust spots early, your metal roof will last a long time.
2. Can I install a metal roof on a flat roof shed?
If pitch is under 3:12, create slope with tapered sleepers (aim ≥ 1/4:12) before installing panels.Use a full ice-and-water shield or high-temp underlayment, then sealed laps or standing seam.
3. How often should I inspect my metal roof?
Once a year should do the trick. Look for backed-out screws, failed sealant, dented panels, clogged gutters, and cut-edge corrosion.
4. Can I walk on my metal roof?
Yes, but make sure you’re walking on the ribs (the raised edges) and not the flat parts. And wear soft shoes, no cleats allowed!
5. What’s the best metal for shed roofing?
If you’re on a budget, corrugated steel is your best bet. It’s affordable, durable, and works well in most climates.