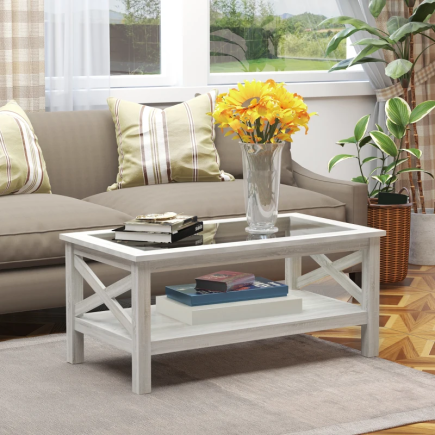
The HOMCOM Lift Top Coffee Table (839-133BN) combines practical storage with modern design. Its pop-up center and three lower shelves provide hidden and accessible storage to keep your living area neat. Follow all safety instructions carefully, assemble step by step, and maintain regularly to maximize its longevity.
Warning and Safety Instructions
- For indoor use only.
- Assemble on a flat, stable, dry surface.
- Use at least two people for assembly.
- Keep packaging materials away from children.
- Do not exceed the table’s weight capacity.
- Keep away from flames and high heat sources.
- Do not modify or alter any parts.
- The manufacturer is not responsible for damage caused by incorrect installation.
Unboxing Your Coffee Table: What’s Inside the Box
Panels & Parts

- Top Panel with Pop-Up Mechanism ×1
- Bottom Panel ×1
- Left Side Panel ×1
- Right Side Panel ×1
- Middle Divider ×1
- Shelves ×3
- Support Rails ×2
- Back Panel ×1
- Hardware Pack
Hardware Pack

- Screws, dowels, bolts, hinges, and any other fittings
How to Assemble Your Coffee Table
When you are going to assemble your HOMCOM Lift Top Coffee Table (839-133BN) follow the steps carefully and refer to the parts images for guidance.
Step 1: Prepare the Base Panels

- Identify the following panels:
- Side Panels ×2 (labeled 2 in diagram)
- Bottom Panel ×1 (labeled 5)
- Left & Right Vertical Panels ×2 (labeled 3 and 4)
- Insert hardware B (×18) into the pre-drilled holes of each panel as shown.
- Make sure dowels are fully inserted and panels are aligned correctly before proceeding to the next step.
Step 2: Prepare the Legs

- Identify the table legs:
- Short Legs ×2 (labeled 8)
- Long Legs ×2 (labeled 9)
- Insert hardware B (×16) into the pre-drilled holes on each leg as shown.
- Ensure all dowels are fully inserted and the legs are ready for attachment to the base in the next step.
Step 3: Assemble the Lower Base Panels

- Identify the panels:
- Side Panels ×2 (labeled 2)
- Bottom Panel ×1 (labeled 5)
- Insert hardware:
- C cam locks ×6
- D dowels ×4
- Attach the side panels to the bottom panel by aligning the dowels with pre-drilled holes.
- Secure the cam locks (C) into the corresponding holes on the panels as shown.
- Ensure all connections are tight and panels are flush.
Step 4: Attach the Middle Divider Panels

- Identify the panels:
- Middle Divider Panels ×2 (labeled 6)
- Insert hardware:
- C cam locks ×4
- D dowels ×4
- Position the middle divider panels onto the base assembly from Step 3.
- Align dowels with pre-drilled holes on the base and secure each panel using cam locks (C).
- Ensure panels are perpendicular and firmly attached before proceeding.
Step 5: Attach the Top Panel

- Identify the panel:
- Top Panel ×1 (labeled 7)
- Insert hardware:
- A screws ×4
- D dowels ×4
- Position the top panel onto the middle dividers and base assembly.
- Align dowels with the pre-drilled holes on the dividers and secure using screws (A).
Step 6: Attach the Legs to the Side Panels

- Identify the legs:
- Short Legs ×2 (labeled 8)
- Long Legs ×2 (labeled 9)
- Identify the side panels:
- Left Panel ×1 (labeled 3)
- Right Panel ×1 (labeled 4)
- Insert hardware:
- C cam locks ×8
- D dowels ×8
Step 7: Attach the Right Side Panel to the Base Assembly

- Identify the panel:
- Right Side Panel ×1 (labeled 4)
- Insert hardware:
- C cam locks ×4
- D dowels ×6
- Position the right side panel against the base assembly and middle dividers.
- Align dowels with pre-drilled holes and secure using cam locks (C).
Step 8: Attach the Left Side Panel to the Base Assembly

- Identify the panel:
- Left Side Panel ×1 (labeled 3)
- Align dowels with pre-drilled holes and secure using cam locks (C).
- Make sure the panel is flush and firmly attached.
Step 9: Secure the Top Support Rails

- Identify the top support rails (long horizontal panels).
- Insert hardware:
- C cam locks ×8
- Position each support rail along the top of the assembly, aligning with pre-drilled holes.
- Secure the rails using cam locks (C) to ensure the structure is reinforced and stable.
Step 10: Attach the Floor Protectors

- Identify the hardware:
- Floor Protectors ×4 (labeled H)
- Place one protector on each corner of the table legs.
- Press or screw into place as indicated to prevent scratching your floor.
Step 11: Attach the Pop-Up Mechanism to the Top Panel

- Identify the top panel (labeled 1) and the hardware:
- Screws E ×8
- Lift Mechanism F ×1
- Lift Mechanism G ×1
- Position the lift mechanisms (F and G) on each side of the top panel as shown.
- Secure the mechanisms using screws (E) through the pre-drilled holes.
Step 12: Attach the Top Panel to the Base Assembly

- Identify the top panel (labeled 1) with the lift mechanisms installed.
- Position the top panel onto the base assembly carefully (requires two people).
- Insert hardware:
- Screws E ×16
- Secure the top panel to the side panels and lift mechanism using the screws.
Care and Maintenance Tips
- Wipe with a soft, dry cloth.
- Spot clean with a damp cloth if needed.
- Do not use harsh chemicals or abrasives.
- Re-tighten screws periodically.
- Keep in a dry environment to prevent warping.
When to Call a Professional
- If major panels are cracked or damaged on arrival.
- If you cannot align panels or mechanisms even after adjustment.
- If the lift-top mechanism or shelves do not function correctly after assembly.
User Guide
Download the User Guide Manual for your reference.
FAQs
1. How do I ensure the table assembly goes smoothly?
Ensure you assemble the table on a stable, dry surface with at least two people. Follow the instructions step by step, aligning all dowels and cam locks correctly. Tighten all screws securely for a stable build.
2. What should I do if the lift mechanism doesn’t work?
Check if all screws are securely tightened and the lift mechanism is properly attached. Ensure there are no obstructions in the mechanism. If problems persist, contact customer support or a professional for help.
3. How can I prevent my coffee table from scratching the floor?
Attach the included floor protectors to each leg of the table. These protectors will shield your floors from any damage caused by movement or contact with the table legs.
4. How do I maintain the coffee table for longevity?
Regularly wipe the table with a soft cloth to avoid dust accumulation. Periodically check and tighten screws, and ensure the table remains in a dry, cool environment to prevent warping or damage.
5. What should I do if the parts don’t align properly?
Double-check the placement of dowels and cam locks. If the parts still don’t align, carefully adjust or reposition them. If the issue persists, consider contacting a professional for assistance.


